Unreal Engine to Sketchfab, Panoramic Environment Tutorial

We have been intending on having panoramas of some of the rooms for a while now but I have been dreading the process for some reason. Turns out, it is very straightforward and easy (dare I say). It takes around 15 minutes to get the panorama working in Sketchfab, so if you are following along, that’s approximately how much time you will need, you mileage may vary of course.

Resulting Panorama

Click the play button to view the scene in 3D.  If you go to Settings->Rendering->Wireframe and select a color, you can see how the environment is merely a cubemap applied to a sphere’s inner faces as texture.

 Capturing the Cubemap in Unreal Engine

Place a Scene Capture Cube in your scene. From my experience, I suggest placing it in the middle of the volume you are trying to capture as having it closer to the edges resulted in perspective distortions for me in the panoramas when the view is rotated.

After you place your Scene Capture Cube object in your scene, check it’s details and uncheck “Capture Every Frame”. You don’t have to, but it really adds up when you have a large cubemap that’s being written every frame and may cripple your system if you have numerous captures going on.


You will notice the Texture Target is set to None as default. We need to create a Cube Render Target and assign it in there so the object knows where to store the cubemap it captures. You can create one by right-clicking in your content browser, selecting the Materials & Textures menu and selecting the Cube Render Target option as shown on the right.

After you create and name your Cube Render Target, drag it on the empty slot to assign it on your Scene Capture Cube object.

You should see a thumbnail generated, if not move your camera a bit so it triggers a capture event. This is necessary if you turned off Capture Every Frame option on the Scene Capture Cube as it now only captures on movement.

Now, double click on your cube render target to open it’s details. I only change the resolution to 2048 (from the default 256) and leave the rest alone. The HDR adjustment options will also be available in Photoshop where you can save presets so you can apply the same settings to all your captures.

Now, all there is left to do is, exporting the resulting HDR image from Unreal. To do so, right-click your cube render target in the content browser and go to the Asset Actions menu and select Export.

So far, we have captured our cubemap and exported it so we can make some adjustments and use it as a texture.


HDR Adjustments in Photoshop

Open you HDR image in Photoshop and go to Image->Adjustments and select HDR Toning. The dialogue shown above will pop-up and you will be able to adjust the same parameters you could in Unreal. I prefer doing it in Photoshop since it lets you save your settings as a preset (the little gear icon next to the dropdown), so you can apply the same settings to other images.

Now, we can export our image from Photoshop, you can use any format you wish to use. I exported as a PNG but I imagine anything compatible with your 3D editing tool would work at.

Using the Cubemap as a Texture

I will be using Maya for the tutorial but any 3D software that is capable of creating a sphere would work. I made a cube and gave it some segments (60×60) and put it up right by rotating it 90 degrees on the X-axis. If we assign a texture now, the texture will be visible from the “outside” of the sphere but not from the inside. To see the texture from within the sphere, we need to “flip” the normals of all the polygons that make up our sphere.

Go to your Mesh Display menu (if not visible, make sure you are in Modeling mode, check the drop-down to the left of your shelves) and select Reverse from the list. This will reverse which way the polygons are facing so the textures we apply on these surfaces will be visible from within the object.

Now assign the cubemap you exported from Photoshop as a Color Texture. When zoomed into the sphere, you should be able to see the texture applied.


Uploading to Sketchfab

Now we just have to export the model and the textures to an FBX and upload the resulting FBX to Sketchfab.

In Maya, go to File->Export All and export your object as an FBX, making sure in your settings, the media files are embedded (Embed Media) so the textures end up being included in your file.

Now, login to your Sketchfab account and upload your model just like any other model. When the upload is complete, go to your 3D settings. You fill see that we are viewing the mesh from the “outside”, unlike Maya where we were zoomed in.

Zoom in and position your camera inside the sphere in Sketchfab scene and click the “Save View” button on the upper-left corner of your viewport.

That’s it! You should be able to see your cubemap as a panorama now!
follow on twitter


Branching Narrative and Using Foldbacks

If you are like me, having spent many summers reading choose your own adventure books, exhausting every path over and over, you probably have a tangible understanding and appreciation of how much work goes into branching fiction.

Not only each branch has to create a meaningful path worth exploring, they also have to provide enough content as to not simply be the wrong thread to follow that wraps up the story in a few pages.

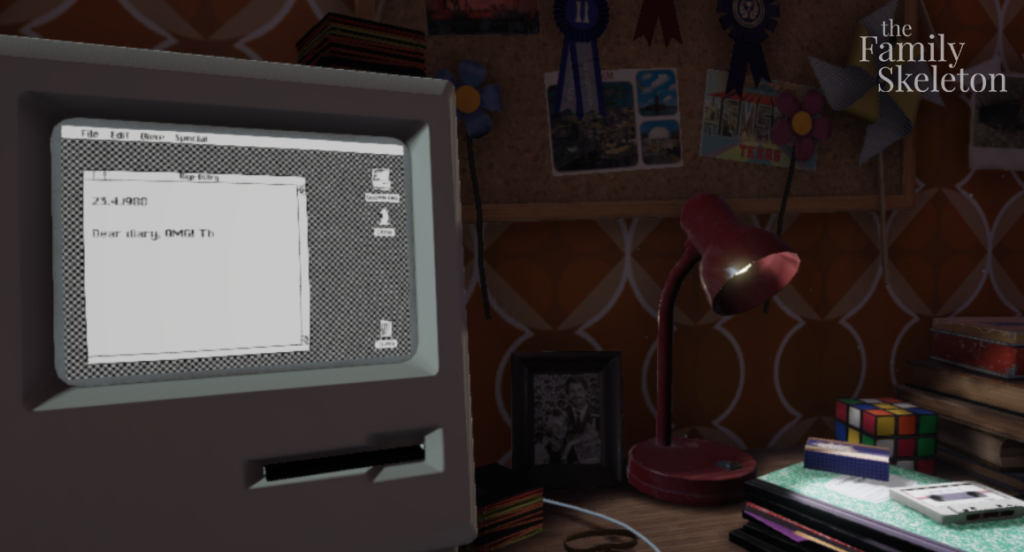
We are working on a prequel for our game The Family Skeleton which employs a branching narrative to tease out some of the story, the characters and the theme for the main game. The game has the player int he shoes of Paige, a young woman who is going through a difficult time. Through Paige’s computer interface, we guide her through different daily events in diary form. She types the day’s events and we pick how it ends for each day, which dictates what happens in the following entry. It is indeed very much like a choose your own adventure book, only darker in theme.

As you choose different options at the end of each diary entry, you rightfully expect a different outcome. That expectation becomes very hard to fulfill by the poor soul who has to write all that text. I will now discuss how a foldback structure every few nodes not only remedies the load branching creates but also can be used strategically to expose the player to certain key nodes that contain essential information regarding the story.

The figure to the side shows how branching would work if each node/page/thing-that-leads-to-a-choice was to let the audience choose one of two paths. There are only two steps into the story with only two choices available yet we have to author seven nodes.

As you can imagine, this gets exponentially larger as we add more choices.


One way to manage the branching is using foldbacks. Every few nodes down a path, we can merge them down to a single one, shown as the yellow node here. This would mean, the user’s choice did not matter in the first place, no? Well, yes. Eventually, we are forcing the user to the content we choose them to see, but this can be used to the advantage of the author.

The nodes user get to explore may reveal information about the story, characters or the lore of the world that may not have any effect on the outcome of the events yet enrich the audience’s experience of the said events by possibly rendering them through a different perspective.

In the context of our game, the player can choose to talk to the counselor about her recurring nightmares or can chalk it up to stress from school and think it would go away on its own. Depending on her choice, the nodes that represent the following days would be different. If she chose to talk to the counselor, the according content would be presented to her, if not, some other content where she does something else. We can merge the follow-ups of these two options into a single node where she, say, gets into an argument with her mother. Considering the argument she got into has nothing to do with the previous choices, we can segue into this new, merged note without building on the choices made.

Choice 1 would read as:

Paige is having nightmares -> Talks to the counselor -> Gets into argument with mom about her behavior.

Choice 2 would read as:

Paige is having nightmares -> She takes a day off to relax, it has been a hard week -> Gets into argument with mom about her behavior.

Moreover, if the argument she gets into is a key moment in the story we have to expose the player to, it becomes a useful device to merge the story into one node here, giving us opportunity to reveal information in a sequence. This, by the way, a very common definition of what a story is: a meaningful sequence of events.

The key here is to not make the player feel like their choices does not matter. The nodes that will be merged still need to have meaningful information and events that either build the characters, have some role-play value or reveal some non-essential information that can have a short term (a few nodes) effect on things. Otherwise, we would be removing the feeling of agency (or the illusion of) and the story would feel more like a theme ride where the player is now merely a spectator and probably pissed at the game as the game keeps rendering them powerless without rewarding their choices with anything.

follow on twitter


Prequel Mechanic / Original Game Mechanic

While in Greenlight, we had comments asking if we will have a gameplay video when we released our teaser trailer which was mostly cinematic camera work and had very little gameplay in it. A perfectly reasonable request, yet we weren’t sure how to address this. The reason behind that was, being a narrative exploration game, the main mechanics are walking and reading notes (in so many different ways) so the only thing left that may be novel is the story and narrative, the telling of the story.

So how do you make a demo for a narrative exploration game without spoiling the story?  If the game’s value lies with the narrative, tone and atmosphere, how can you deliver a demo based on those values?

Rather than a demo, we decided on making a prequel that reflects the same atmosphere, environment and theme we will be delivering in the original title. After all, the game’s unique selling point is not a novel mechanic or interaction paradigms but the narrative. A prequel, while not sharing the same mechanic with the game, lets us explore a part of the story the player won’t get to explore with the original game and justifies using different mechanics. This would allow us to tease the characters, the tone, and the events the player will be exploring in the full-feature game. After all, if the player is reading some notes in the original game, it means that someone wrote them at some point. What better way than to play with one of the characters during the time the events took place, writing said notes.


The following part of this post will contain spoilers regarding our game The Family Skeleton. 

                                                Playing as Paige, decades before the discourse/narrative time. 


In the demo prequel we are working on, the player gets to play as Paige who has been dead for almost three decades during the time the actual game takes place. In the full-release of the game, you play as Tom, Paige’s little brother who is around age four during the prequel and is in his thirties during the original game. As we play in the shoes of Tom as an adult, we discover what the circumstances were that led to Paige’s suicide. As you can see, the story will be about Paige, and not only we are merely an observer (as Tom), we will also never get to meet Paige (other than as a ghost). Considering the whole thing revolves around Paige, we decided to feature Paige as the avatar in a small demo where the players can get a glimpse into what it was like to “be” her by directing her diary entries. We go though several journal entries, in a choose-your-own-adventure style interaction. The player is presented with choices after a body of text has been displayed. Each answer leads to the journal entry being expanded and eventually followed by another entry.

While there are no correct paths to follow, the demo can be played to explore different paths, each revealing a different part of the story or a different detail about a character. It is written to be exhausted by the player. As the demo is designed to tease the story and some of the character’s in Paige’s life at story-time, having an entirely different mechanic that facilitates the exploration of the story was justifiable.

The hands’ idle animations, depending on what part of the story has been established depending on the entries the user commits to changes, revealing Paige’s self-harm scars or switching to another idle animation that has a more anxious quality to it. Here, the hands are employed as a narrative device, telling an unspoken/un-typed part of the story without necessarily spelling it out for the player. By then, the player already has read about using rubber bands to fight the urges  for self-injurious behavior in a journal entry. If the player has knowledge of how these objects relate to self-harm, they may see it coming; if not, it will hopefully click when the animation plays to reveal the scars.

follow on twitter

Modular Spook Sequencer Blueprint

We created a spook sequencer for some of the events and thought might be useful for some. It has a trigger area that the player can walk in and it fires off some common events such as shutting a door, knocking something over, making a sound or spawn some particles somewhere. By introducing delays, we piggyback some events.

Here is how tit looks like in action. The player steps in, The razorblade particles are spawned in the room with a 3 sec kill delay. The door is also set to slam shut in 2 seconds and a commentary by the player character is triggered right then.

In this instance, this specific door is the door that will do something when the player triggers the event. We can slam it shut or open it. The door is slightly ajar at 50 degrees. When we fire off the slam shut event, it calls the “slam shut” function in the door class. The razorblade particle system is set to die off at 3 seconds and is dissolved as the player enters the room. This Blueprint will surely expand as our needs grow but so far we have used it in 3 scripted events and works pretty good.


follow on twitter

Villianization of Mental Illness in Video Games

Recently, John Wolfe made some thoughtful comments regarding the villianization of people with mental health problems. We would like to expound on the problem John pointed out and discuss why this is a problem and what can be done against it.

One US study reports that nearly half of the respondents reported at least one life-time disorder and nearly 30% reported at least one 12 month disorder (Kessler et al., 1994). That means, almost half the population has a history of mental illness. Depression, Obsessive Compulsive Disorder and Schizophrenia along with numerous ones more uncommonly heard of are included under this umbrella. This means there is a wide spectrum of mental health problems in a large portion of our society.

There has been an increase in perceived dangerousness of people with mental health issues from 1950-1996 (Link and Phelan, 1999). With the misinformation and misrepresentation that has been going on, it is safe to assume this trend has not slowed on the last decades. Stout et al.(2004), in their overview of portrayal of mental illness in the media, found a consistent misrepresentation, exaggeration and misinformation of mental health problems. Two outstanding conclusions were that the portrayal of mental health patients implied that they were dangerous and they should be avoided (ibid). Movies, newspapers and video games all feature characters with mental health issues. When the authors present these characters as hostile and dangerous, it perpetuates the misrepresentation of both the patients and the nature of the mental illness. In terms of writing for games, it is a cheap way of having an encounter that is unpredictably violent. Consequences of these misrepresentations however create real life problems for people with mental illness.

Stigma towards mental health problems, harm the sufferers in many ways. People with mental health problems have harder time finding housing or getting good jobs due to the prejudice from their communities (Corrigan, 2004).  People who suffer from these problems may help seeking help, afraid of facing stigma and prejudice. In cases with self-harm and suicidal behavior (two very different things) creating a barrier for getting help contributes to the morbidity of these illnesses.

Most of the time, I do not think the developers put much thought into what the images they create may mean. I am willing to bet the “insane” can be interchangeably used with “zombie”, “nazi”, “goblin” in some games and it would not make a difference regarding the gameplay. And if it is in for the the story, I hope they do better research regarding what they are portraying. You can’t stretch the definition of an illness to fit your gameplay without doing injustice to a bunch of people who do suffer from said disease and do not display the symptoms you made up to make it scarier.

What can be done?

Corrigan and Pen (1999) suggest a 3 step approach. Protest, education and contact. Merely protesting may help diminish stigma but is not enough to change the attitude towards a more constructive one. Content creators like game-developers, movie-makers and authors can educate their audiences. While stopping using such tropes would help in not perpetuating the problem, portraying mental health illness in a more sensible and informed context may help educate the audiences. After a change in attitude, contact with people with mental health problems may become a non-problem as the audience now is less expectant of violent behavior from the person with mental illness.

  • If you are in the audience, protest if you feel you are being served misrepresentations.
  • If you are a content creator, put more thought and sensitivity into what you are communicating.

We do think there is a place for mental health problems in games, the question is are we as developers willing to put more thought into our characters and stories they tell. And are we as the consumer willing to suspend our disbelief so much that we buy what is on the screen without a question and let it shape our opinions without having our own lived experiences with these subjects.

References:

Corrigan, P. W., & Penn, D. L. (1999). Lessons from social psychology on discrediting psychiatric stigma. American Psychologist, 54, 765–776.

Corrigan, P. (2004). How Stigma Interferes With Mental Health Care. American Psychologist, 59(7), 614–625. https://doi.org/10.1037/0003-066X.59.7.614

Kessler, R. C., McGonagle, K. A., Zhao, S., Nelson, C. B., Hughes, M., Eshleman, S., … Kendler, K. S. (1994). Lifetime and 12-Month Prevalence of DSM-III-R Psychiatric Disorders in the United States: Results From the National Comorbidity Survey. Archives of General Psychiatry, 51(1), 8–19. https://doi.org/10.1001/archpsyc.1994.03950010008002

Link, B. G., Phelan, J. C., Bresnahan, M., Stueve, A., & Pescosolido, B. A. (1999). Public conceptions of mental illness: labels, causes, dangerousness, and social distance. American Journal of Public Health, 89(9), 1328–1333.

Stout, P. A., Villegas, J., & Jennings, N. A. (2004). Images of Mental Illness in the Media: Identifying Gaps in the Research. Schizophrenia Bulletin, 30(3), 543–561. https://doi.org/10.1093/oxfordjournals.schbul.a007099


follow on twitter